
If you are a beginner to sewing and dressmaking, it will only be a matter of time before you come across the need for interfacing fabric. Whether you are making a blouse with collar and cuffs, a dress with a button front, or even a simple bag, interfacing is one of the most important tools in your sewing kit. Yet for many beginner sewists, choosing the right interfacing can feel highly confusing.
In this guide, we’ll explain what interfacing is, the different types available, when you might use it and how to choose the correct interfacing for your fabric and project.
What is interfacing?
Interfacing is a fabric which is used to make certain parts of a garment more stable. It is used as an additional layer which is applied to the inside of garments, such as collars, cuffs, waistbands and pockets, helping to add firmness, shape, structure, and support to the clothes. It is attached to the reverse side of the fabric and therefore invisible once the project is completed.
There are a variety of garments which are stronger and last longer when they have been stabilised with interfacing fabric. For example, if you are designing a pair of trousers with buttons, there needs to be a stabiliser to prevent the buttons from ripping off and damaging the fabric. Garments like jackets and coats use a lot of interfacing fabrics, as this helps to retain their shape and ensure they don’t stretch or distort with regular wear and tear.
Common Uses of Interfacing


The most common uses of interfacing are for dressmaking but if you enjoy working on bag projects, interfacing can be utilised for these too. With the right pattern you can create the most gorgeous backpacks, clutches, handbags and more, and interfacing is an essential part of that process. The same way interfacing benefits clothing garments, they also add structure and strength to the bag fabric, making soft, flexible, or stiff, rigid bags you will love.
Garments
- Shirt collars and cuffs
- Button Plackets
- Waistbands
- Lapels and Jacket Openings
- Facings (to finish necklines and armholes)
- Pocket Openings
Bags and Accessories
- Handbags
- Tote bags
- Purses
- Cosmetic and wash bags
Why Use Interfacing?
Interfacing fulfils several important functions:
- Adding Structure
Interfacing helps garments maintain their shape. Examples include a collar or cuff which needs interfacing to remain crisp and stiffer than the rest of the garment.
- Reinforcing the Fabric
Areas of a garment which undergo frequent stress such as pockets, waistbands and buttonholes require additional reinforcement to prevent fabric breakage.
- Preventing stretching
Interfacing can stabilise garment areas which might otherwise stretch or distort during wear.
- Increasing Durability
Interfacing can help extend the life of your make by supporting the areas which undergo the most use.
- Minimising Wrinkles
Interfacing can also help reduce wrinkles on fabrics which are prone to creasing.
The Main Types of Interfacing
There are so many different types of interfacing fabrics to choose from, it can be quite overwhelming. In general, interfacing comes in two main types, fusible or sew-in, as well as three main weaves (non-woven, woven and knit), and different weights. When designing your piece, it is important to make the right choice, as this decision can really influence the final look of your garment.
For a very quick overview, head over to the Fabrics Galore Instagram page for Issy's lowdown on interfacing.
Fusible v Sew-In Interfacing
Fusible interfacing

With a heat activated adhesive on one side, which bonds to the fabric when pressed, fusible interfacing is the easiest to use as it only needs to be heated up with the iron and it will permanently stick to the fabric. As a beginner dressmaker, fusible interfacing is going to be a lot easier and more convenient to use. It works well on most garments, except on certain fabrics that don't like heat or are loosely woven, as this can cause the glue to seep through the facing fabric. Highly textured fabrics, or fabrics with a nap like velvet and corduroy, should also be avoided, as the glue won’t bond well to the fabric.
Advantages
- Quick and easy to apply
- Suitable for most sewing projects
- Ideal for beginners
- Creates a smooth finish
Common Uses
- Shirts and Blouses
- Dresses and Skirts
- Children’s Clothing
- Bags and accessories
Explore our range of fusible interfacing fabric.
Sew-in interfacing
Unlike fusible interfacing, sew-in interfacing is stitched into the garment rather than fused with heat. It is sewn onto the main fabric just like another layer of fabric, often resulting in a more natural shape and drape without any stiffness to it. This type of interfacing is ideal when you have a fabric that cannot be ironed or if your project involves a delicate or textured fabric.
We recommend that you only use sew-in interfacing when you are completely comfortable handling multiple layers of fabric on the sewing machine. Otherwise you risk affect the shaping of the garment and giving it a poor finish.
Advantages of Sew-In Interfacing
- Preserves fabric drape
- Works well on delicate or textured fabrics
- Offers a superior finish on tailored garment
Common Uses
- Tailored jackets
- Delicate Silks
- Textured fabrics like velvet or corduroy
Woven, Non-Woven and Knit Interfacing
Woven interfacing

Woven interfacing is made like any regular woven fabric so also looks, feels, and moves like fabric - albeit a thicker one. One of the important things to remember about woven interfacing is the fact that this type of interfacing will have a selvedge and therefore a grainline, so you need to make sure you follow the grainline just as you would when cutting out your main fabric. As this material is trickier to work with, woven interfacing is normally only used for particularly fine materials such as sheers and silks. Explore our range of woven interfacing fabric
Benefits
- Natural drape
- Maintains fabric movement
- Perfect for a professional looking finish
Non-woven interfacing
Non-woven interfacing is made by bonding fibres together rather than weaving them, which gives it a very thin paper-like feel. It has no grain, can be cut in any direction and won’t fray. This is often the simplest material to use and is suitable for most garments, providing you with almost endless dressmaking possibilities.
- Easy to cut
- No grainline to worry about
- Versatile and widely available
Knit interfacing
If you are using a knitted or stretchy jersey fabric, knit interfacing is the choice for you. It is produced by knitting the fibres together, which allows you to maintain the stretchiness of your garment. For example, if you were to use woven interfacing to a knit fabric, you would reduce the fabric’s stretch properties, so always match a knit interfacing to a knitted fabric so that they move together when worn.
Benefits
- Supports knit fabrics without stiffness
- Prevents distortion
- Maintains stretch
Sewing Tip: When adding interfacing to a stretch fabric, be sure to cut the knit interfacing so that its crossgrain is aligned with the pattern’s grainline and matched to the outer fabric so that the the interfacing stretches with the fabric.
Stitch and Tear Interfacing

Stitch and Tear Interfacing, also called tear-away stabiliser, is a niche form of interfacing which is discarded or torn away after stitching. It acts as a temporary backing placed under delicate fabrics to prevent stretching and puckering during fine and detailed sewing. It is used for embroidery, appliqué and decorative sewing.
Benefits
- Stabilises and provides rigid support for delicate and stretch fabrics
- Easy to use: the interfacing is simply pulled away after stitching
How to Choose Interfacing in 3 Steps
Step 1: Match The Interfacing with the Fabric Type
Woven fabrics -> Woven Interfacing
Craft Projects —> Non-Woven Interfacing
Stretch Fabrics —> Knit Interfacing
Embroidery and Appliqué —> Stitch and Tear Interfacing
Step 2: Match the Interfacing Weight with the Weight of the Fabric
As a rule, choose interfacing which is either the same weight or slightly lighter than your fabric. See our dedicated section below on Interfacing weights.
Step 3: Decide between Fusible or Sew-In Interfacing
Choose fusible for ease of use and convenience or sew-in if working with delicate fabrics, textured fabrics or when making tailored clothes
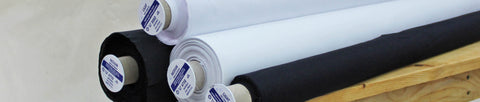
Interfacing Weight Guide


Lightweight interfacing fabric in black and white
As a general rule of thumb, the weight or thickness of your interfacing should match your fabric.
Therefore, we recommend choosing the interfacing according to the weight of the fabric you are sewing and whether you need a soft drape or a stiffer shape. For more detailed information on weight, read our separate blog on How to Select Interfacing Weights.
In most dressmaking projects you should only need to use lightweight interfacing which is perfectly suitable. However, if you are working with stiffer cottons like poplin or shirting, medium weight interfacings are a much better option. Heavy weight interfacing is normally only needed when making jackets or coats, or for adding structure to hats or bags.
|
Fabric
|
Recommended Interfacing Weight
|
|
Bag Fabric
|
Heavyweight Interfacing
|
|
Cotton Lawn
|
Lightweight woven fusible
|
|
Cotton Poplin
|
Lightweight or medium weight woven fusible
|
|
Denim
|
Medium to Heavy woven interfacing
|
|
Jersey
|
Lightweight knit interfacing
|
|
Linen
|
Light or Medium weight woven fusible
|
|
Ponte Roma
|
Medium weight knit interfacing
|
|
Viscose
|
Lightweight woven or sew-in
|
|
Voile
|
Lightweight woven fusible
|
|
Wool Coating
|
Heavyweight woven or sew-in interfacing
|
How to Apply Fusible Interfacing
- Pre-test your chosen interfacing on a small fabric scrap.
- Cut the interfacing to match your pattern piece.
- Identify the side with the adhesive.
- Place the adhesive side against the reverse side of the fabric.
- Cover with a clean pressing cloth.
- We recommend pressing with an iron for at least 12 seconds and up to 15-20 seconds without sliding the iron around.
- For larger pieces, lift and re-position the iron rather than sliding.
- Allow the fabric and interfacing to cool down completely (30 minutes recommended) before handling or sewing.
Common Interfacing Mistakes to Avoid
- Choosing the wrong weight of Interfacing
- Using woven Interfacing on stretch fabrics like jersey
- Skipping a test piece
- Sliding the iron when pressing
- Handling the fabric with the newly applied interfacing before it cools.
Frequently Asked Questions
How to Purchase Interfacing Fabric

Interfacing, although hidden on the inside, is often the unsung hero of your projects and its impact on the finish is significant. Choosing the correct type, weight and application method can transform your sewing projects from home-made to professional-looking. It’s therefore worth taking the time to select the right interfacing, matching the type to your fabric, choosing the correct weight and always testing on a fabric scrap first. It will make all the difference to the appearance of your finished project.
If you would like to purchase interfacing fabric for your next sewing project, at Fabrics Galore we have a collection of interfacing fabrics for dressmaking and crafting in both light and medium weights, and different neutral colours including black, white, cream, beige and grey. If you sew frequently, it’s always a good idea to stock up on interfacing during our sales as it will always be used and you won’t run out.
However, if you are struggling to make a decision on which interfacing to choose, the team at Fabrics Galore would be more than happy to help. We can advise whether fusible interfacing is right for you, what weight of interfacing you should buy, and what colour is most appropriate for your garment. To have a chat with a member of our team, please feel free to give us a call on 020 7738 9589, and we would be happy to assist.
Authored by: Annabelle Rigg, Online and Store Manager at Fabrics Galore London
Reviewed by: Paul Johnston, Owner and Founder of Fabrics Galore London since 1992
